The Cold Boot Walkthrough Guide
Note! This guide has spoilers as it covers the progression of the game.
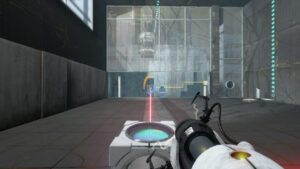
1. Test Chamber 01/22
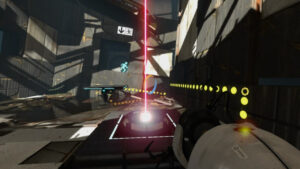
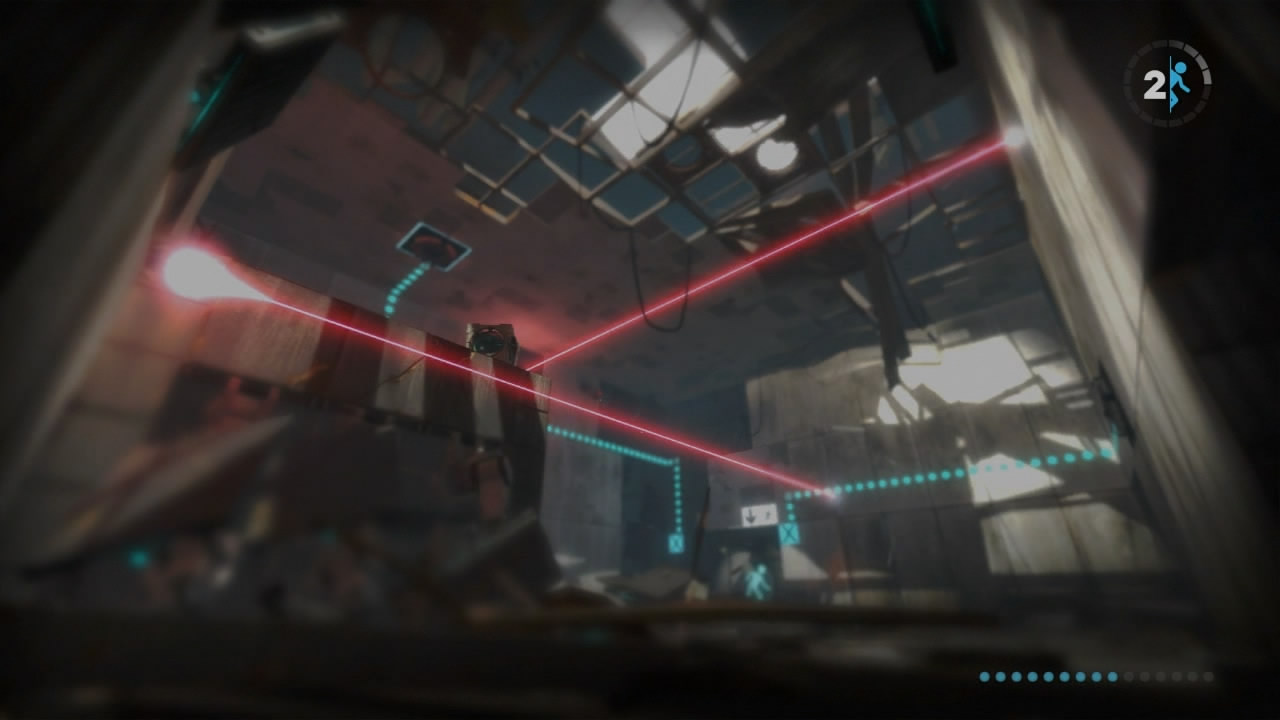
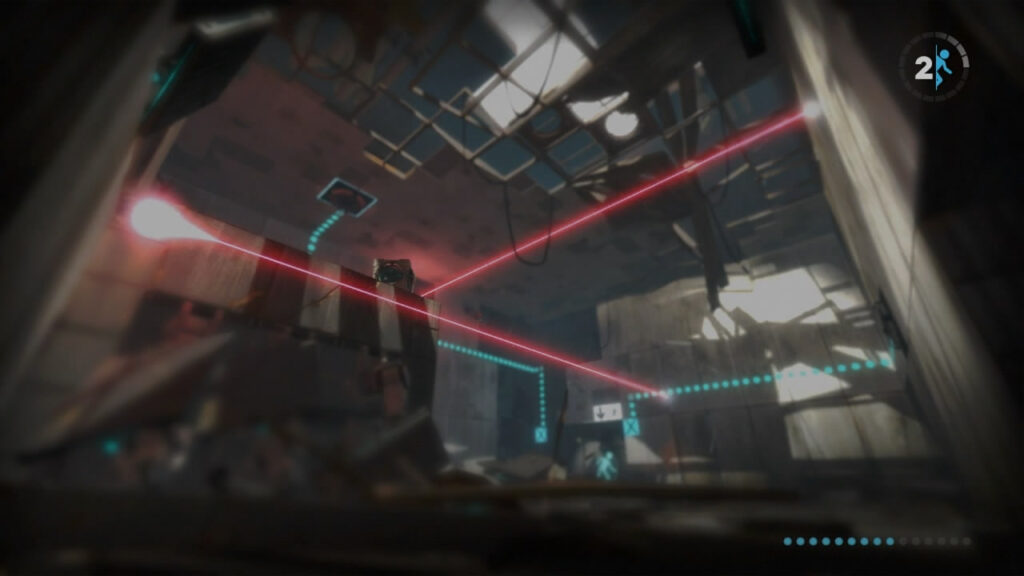
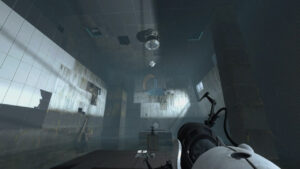
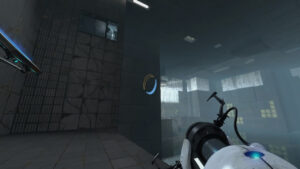
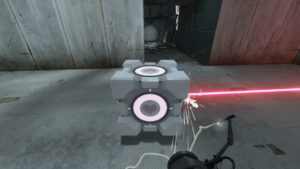
This first chamber in Chapter 2, The Cold Boot, of Portal 2 you will be introduced for the first time to the Thermal Discouragement beam. After a brief monologue from GLaDOS, two platforms will rise, one on the ground to the right and one on the ceiling to the left.
Note: Thermal Discouragement beams or more simply, the lasers in Portal 2, will hurt you when touched, but do not kill you instantly, so while a bad idea, in most situations touching these beams is not catastrophic.
The Thermal Discouragement Beam in this chamber will appear from the ceiling and striking the floor beneath it. First you will want to stand on the platform at the far end of the chamber that will be raised to the exit door. Next, in order to complete this quick puzzle, simply fire one portal where the laser hits the floor and your second portal above the laser receiver. This will cause the platform you should be standing on to raise and the exit door to open, allowing you to leave this chamber.
Time-stamp: 00:33

1-A. Undiscouraged
As part of the natural progression of the game, Undiscouraged will unlock after completing Test Chamber 01/22. It is not possible to miss this achievement or trophy.
Xbox 360: 10 Gamerpoints.
PS3: Bronze Trophy.
Time-stamp: 01:42
Test Chamber 02/22

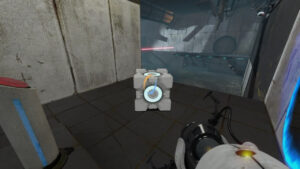
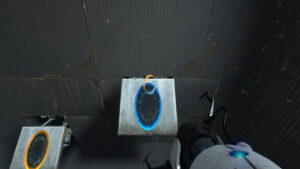
In the second test chamber of this chapter you will be presented with another Thermal Discouragement Beam test, this time with the addition of Discouragement Redirection Cubes.
Your first task in this chamber will be to head to the far left side where you will find one of these Redirection Cubes behind some wreckage that blocks you from getting to it directly. Fire a portal on the ground underneath it with another on your side of the floor so you can grab the box as it falls through.
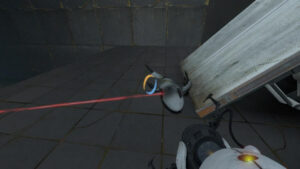
The Discouragement Redirection Cube works by redirecting laser beams that hit any side of one out the front side of the box. The front side is the side of the cube which is pointed away from you when the cube is picked up. In other words, if your holding the box, redirected lasers will fly towards your cross hair.
Place the cube on the white surfaced floor so that it redirects the laser that comes from the generator into the nearby receiver both near the center of the room. This will raise some stairs for you to reach the exit door’s ledge where a button sits.
From this ledge, fire a portal on the ground by you on the ledge and a second portal underneath your Redirection Cube to bring it up to the ledge with you. Place the cube on the button to open the exit door and complete this test chamber.
Time-stamp: 02:21
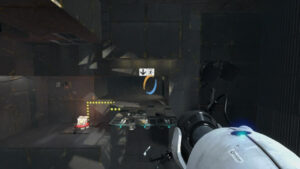
Test Chamber 03/22
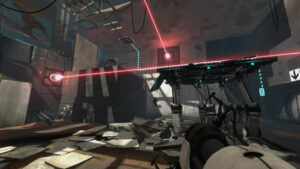

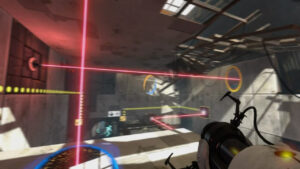
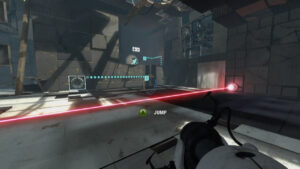
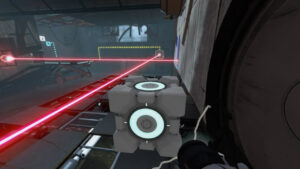
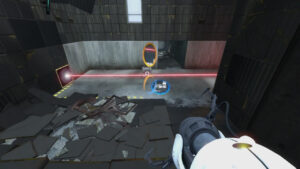
In the third test chamber of The Cold Boot you will be presented with another Thermal Discouragement Beam test, this time with two receivers which must be hit by their respective lasers in order to open the exit door.
First portal your way onto the larger platform that sits under the ceiling receiver. Once up on this ledge, use portals to reach the smaller platform in the central of the room, dropping from the ceiling onto it, with the Redirection Cube in hand.
Once on this central platform you can use the Redirection Cube to angle the lower of the two lasers that passes just over this platform into the receiver on the wall to the right of the exit door. Once this is done, drop down and portal your way back to the other ledge.
Finally you will need to use your portals to redirect the second laser into the ceiling receiver, firing one portal where the laser currently strikes the wall and the second where you can see the faint red dot on the floor of this ledge. This will cause the second laser to strike the second receiver, opening up the exit door for your departure.
Time-stamp: 05:12
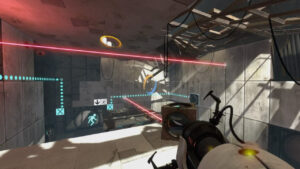
Test Chamber 04/22

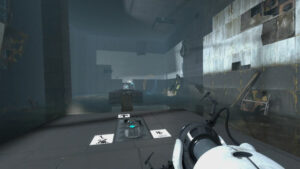
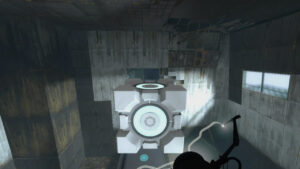
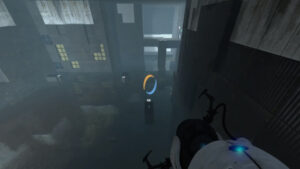
In Test Chamber 04 of Chapter 2, after navigating some hallways you will find yourself in a room with a Thermal Discouragement Beam Generator on the far end, a Cube Dispenser in an alcove to the left and the exit door and controlling button to the right alcove. There is a pool of water in the center of the room, taking up the majority of space with two platforms, one you enter on and the second by the exit door.
Start off by firing your orange portal at the wall next to you, trying to line it up with the receiver on the far end of the room. Use your blue portal where the beam hits to test and make sure your placement is correct before switching your blue portal to the far end of the room by the cube dispenser. Step through your portals and hit the switch to receive your cube.
Now put your blue portal back where the laser is hitting the wall to send it out your orange portal and back into the receiver (you checked your placement before coming here, right?). This will make the platform by the exit door start to move back and forth between that alcove and the alcove containing the Cube Dispenser.
Stop the platform when it reaches your alcove by moving your blue portal and get on with your cube, placing it on the center of the platform then standing on top of your cube. Put your blue portal back where the laser hits the wall to reactivate the platform when you are ready.
Now standing on your cube is not necessary, as technically you can jump of the laser beam when the platform begins to move underneath it on the way to the exit, but it is far easier to stand on your cube instead. This will cause the beam to be blocked by the cube instead of the beam frying you when the platform moves under it, allowing you to get on the other side of your cube and pick it back up and out of the path of the beam to reactivate the platform once more. Once it reaches the exit door alcove, jump off and place your cube on the button to secure your exit.
Time-stamp: 07:24
Test Chamber 05/22
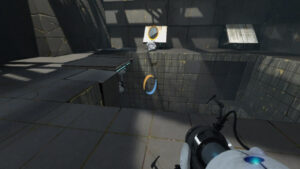
Test Chamber 05 will introduce Aerial Faith Plates into the puzzles of Portal 2. In this room there will be 3 faith plates, 2 on the far ends of the room on platforms with one in the center underneath a Vital Apparatus Vent (cube dispenser) and surrounded by a large body of Toxic Water.
Start by stepping on the Aerial Faith Plate on your side of the room to reach the far platform where you will find the switch to activate the dispenser to drop a Weighted Storage Cube onto the middle faith plate. This cube will bounce up and down over and over as the faith plat will only launch it straight up.
From here you will need to time your use of the faith plate so you launch yourself about a second or so before the cube reaches the apex of its flight, or the highest point in which it travels. Timed correctly you should be able to grab the cube right out of the air before returning to the exit door’s platform via the faith plate again, to place your cube on the button and leave this chamber.
Time-stamp: 11:10
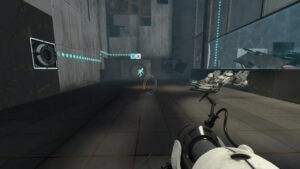
Test Chamber 06/22
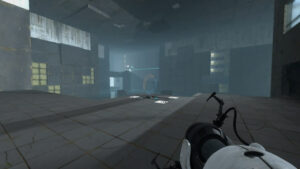

In Test Chamber 06 you will find a far larger room with several faith plates that are arranged as such to transport you to a far ledge with the combined use of portals. Keep in mind there are a total of 3 achievements or trophies, Pturretdactyl, Drop Box and Final Transmission, which can be attained in this level, all of which you will have to go out of your way for.
Note: Now is a good point to save your game if trying for all 3 achievements in this level, so you can reload if you mess anything up.
Starting off to get a good sense of things, you should start your trip on the faith plates. You will be launched a couple times before coming to a stop in an alcove where there are two slanted portal-able surfaces. This area is important, so we will label it the connection point for the purpose of this guide since portals placed on these two slanted panels will serve to connect the series of Aerial Faith Plates that serve to transport us to the far ledge with the Vital Apparatus Vent switch.
Portal your way back to the start by placing one on the left slanted panel and the other on the wall by the entrance door. From here you can either walk down the platform the entrance is at to see the slanted surfaces and place your second portal on the right one, or jump on the faith plate first and place your portal while in mid air, before you hit the surface itself (this is far more exhilarating). Done correctly, you will continue your faith plate journey through your portals and onto the ledge with the switch we need to get to as well as the exit door nearby.
Note: If you need the achievements or trophies for this level, take the time to now read the Pturretdactyl, Drop Box and Final Transmission portions below before continuing with the main puzzle itself.
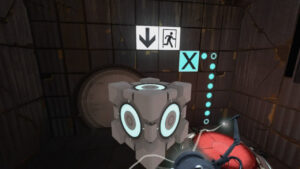
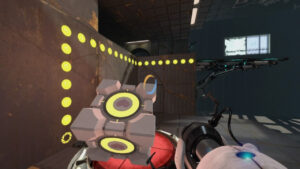
Hitting the switch for the first time will drop a series of garbage items from the dispenser which are part of 2 of the achievements above. The next item will be the Weighted Storage Cube which we will need to place on the button which you can see from the ledge, separated from you by the Toxic Water in an area you cannot reach.
The easiest way to get the cube on the button would be to move your orange portal, which should be the exit portal for the connection point, to the white space above the button whilst keeping your blue portal (or replacing it if moved previously) on the right slanted surface at the connection point. This will cause the cube to be thrown through your portals and directly onto the button, also satisfying the Drop Box achievement and trophy. You are now free to leave via the exit door.
Time-stamp: 12:58
6-A. Pturretdactyl

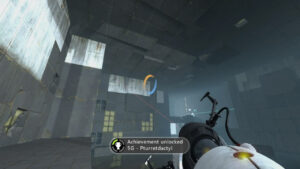
When you first activate the switch for the Vital Apparatus Vent in Test Chamber 06 of Chapter 2, it will eject a series of junk items instead of the cube you need. One of these items will be a malfunctioning and non-hazardous turret. Before hitting the switch for the first time, remove your portals from the connection point (slanted surfaces used to connect the faith plate journey) as to prevent the turret from falling into the water. If you fail to remove these portals, the turret will make the entire faith plate journey before flying into the water past your ledge.
The turret should smack into the slanted surface and come to a rest on the platform the slanted surfaces are on. Portal over here to pick up the turret, then portal back to the beginning of the chamber where you entered with the turret in hand. Walk up to the Aerial Faith Plate and drop the turret on it to unlock this achievement.
Xbox 360: 5 Gamerpoints.
PS3: Bronze Trophy.
Time-stamp: 15:23

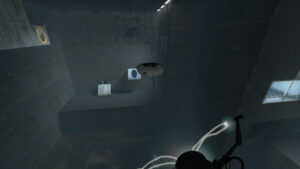
6-B. Drop Box

The second activation of the switch, after dumping the various garbage items, will release the Weighted Storage Cube you need for the button in Test Chamber 06. Place a portal on the right slanted surface used to travel along the faith plate journey with your second exit portal placed on the white space directly above this chamber’s button. The cube will fly directly through the portals, onto the button which will unlock this achievement.
Xbox 360: 20 Gamerpoints.
PS3: Silver Trophy.
Time-stamp: 16:09

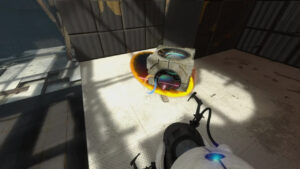
6-C. Final Transmission

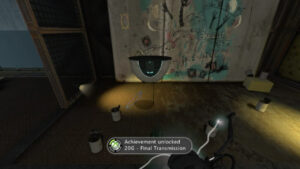
Closely related to the Pturretdactyl achievement and trophy, this task involves first collecting a miniature radio that falls out of the Vital Apparatus Vent as one of the junk items. If you removed the portals from the slanted surfaces for the turret retrieval, you will also find this radio on the same platform. If you did not remove the portals, it will be on the ledge by the dispenser switch. The radio actually plays a version of the final credits song from Portal 1.
From the connection point, fact the slanted platforms and look to the top right. You will see a room behind the walls that has some glass windows, one of which is smashed. Opposite of this window you will find some white space on the left of the slanted panels where you can put an exit portal to propel yourself into this room. Place an entrance portal on the slanted surface you will be launched into by the faith plates to make this journey possible. You can hit these two locations with portals from the start location by the first faith plate, which you should travel to before placing the portals.
Collect the radio, head back to the start and place the portals mentioned before jumping on the faith plates. You should end up inside of the room mentioned and walking further inside with your radio will cause it to emit a new interference type noise while unlocking the final transmission achievement.
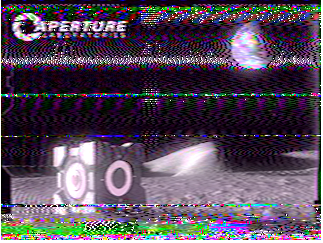
Note: This sound is actually an image transmitted as audio (SSTV). Translated back into its image form, it produces this picture below. (Credits to Pikandy for the pic)
Xbox 360: 20 Gamerpoints.
PS3: Bronze Trophy.
Time-stamp: 16:40 – 18:43
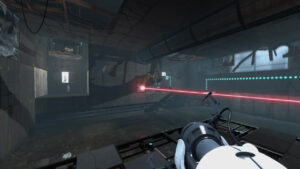
Test Chamber 07/22
Upon entering Test Chamber 07, you will encounter an old friend, the Weighted Companion Cube, among a raised Victory Lift and a Thermal Discouragement Beam Generator striking its receiver that sits directly across from it. Your first couple attempts at retrieving the Companion Cube for its use in this puzzle will end in it’s prompt fizzling as GLaDOS continues her attempts to screw with you.
Once GLaDOS is done with her latest attempts at breaking your morale, take the Companion Cube and place it in the laser’s path to drop the nearby Victory Lift (ie: raising platform) down to the ground. The cube will only fizzle the first time you attempt this.
Once the platform is down at your level, get on top of it before moving the cube out of the way by firing one portal underneath it and the second on the wall. Once the platform has reached the top, you can bring the cube up by again placing a portal underneath it with a second portal on the slanted panels at this top level.
Retrieve the cube and place a portal at the bottom of the shaft you entered from and a second portal on the right of the two slanted panels (facing them). Grab the cube and jump through the portal at the bottom of the shaft, which will propel you with gravitational force out the second portal on the slanted surface, launching you and the cube up to the platform containing the button.
Leave the cube on the button to open the exit door and raise a panel for you to land on in the next jump. Move your exit portal from the right slanted surface to the left one and perform your gravity assisted flight through the air once more to reach the ledge containing the exit door, landing on the panel you just raised.
Note: You are now finished with the main puzzle portion of this chamber, but if you want the Preservation of Mass achievement, now is the time to check the subsection below for it’s methods before leaving this area entirely.
Time-stamp: 20:21
7-A. Preservation of Mass
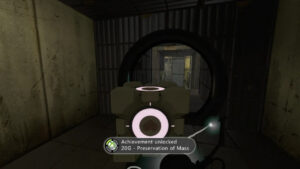

This achievement will require you to leave the test chamber with the trusty Companion Cube which is made possible due to the fact that this chamber’s Material Emancipation Grill has stopped functioning. In order to do this, walk through the exit door and place an exit portal on one of the walls here.
Next head back out the exit and run back to your companion cube, grabbing it and running towards some portal-able surface nearby. Place an entrance portal, making sure not to replace your exit portal (or else you will have to redo the puzzle) and step through with your Companion Cube, now past the exit door. GLaDOS will cut this victory short however and will still fizzle your Companion Cube before you are able to fully exit the level via the Transportation Tubes.
Xbox 360: 20 Gamerpoints.
PS3: Bronze Trophy.
Time-stamp: 24:00
Test Chamber 08/22
The final test chamber in Chapter 2, The Cold Boot, of Portal 2 is actually pretty quick and easy. Upon entering, hang around for a few seconds while GLaDOS fixes things up and constructs some stairs for you to step through the Material Emancipation Grill that divides this room.
Get on the other side of the Emancipation Grill before trying to use any portals, as stepping through this field fizzles all placed portals and objects. Once through to the side with the Thermal Discouragement Beam, place one portal on the wall on this side and look through the hole of the glass wall to the other side of the Emancipation Grill so you can shoot an exit portal on the opposite side of the room. Doing this allows you to move past the Emancipation Grill freely as to avoid having anything fizzled by moving through it instead.
Next hit the switch for the Vital Apparatus Vent to drop a Discouragement Redirection Cube on the opposite side of the grill. Use your portals to go pick it up and get back on the side with the switch. Now take the cube and redirect the laser, which can be in-fact directed through the grill, but only the laser itself, into the receiver on the opposite side of the room. Once the receiver is activated the exit door will open and you can step through your portals one last time to leave this room. Be careful not to triumph in victory to early and charge back through the emancipation grill in this room on your way out, or you will undo all your handy work.
Time-stamp: 24:55
Video Guide
Last Updated on October 5, 2020 by Standard of Entertainment