
The Return Walkthrough Guide
Note! This guide has spoilers as it covers the progression of the game.
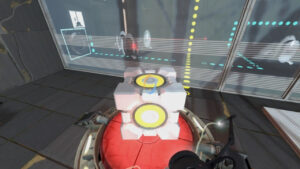
Test Chamber 09/22
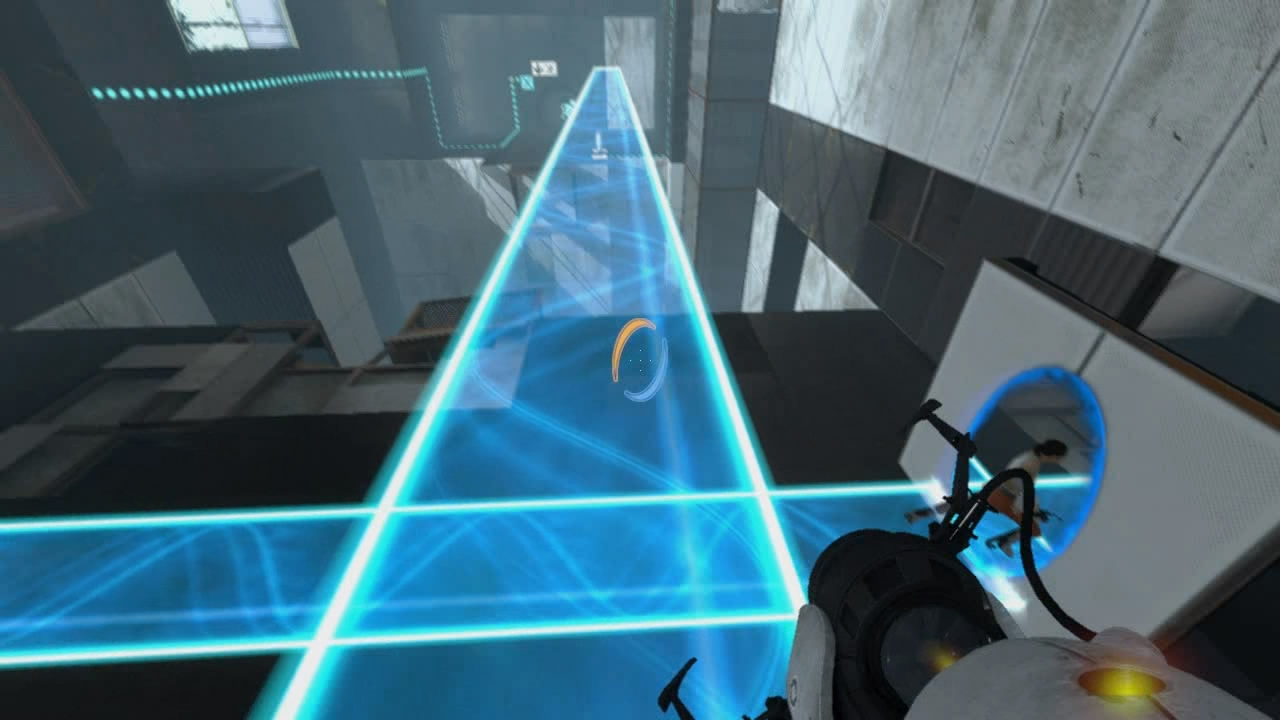
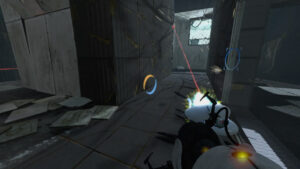
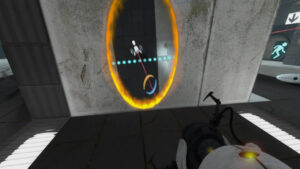
In the first test chamber of chapter four, you will undergo some more berating from GLaDOS on the “generousness of your body” as you attempt to use the faith plate in this room. Keep attempting to use the pad until GLaDOS lowers the ceiling, then use portals above the faith plate and an exit over the upper level ahead. For reference, the portal above the faith plate will be the orange portal.
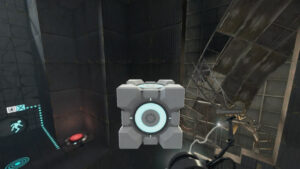
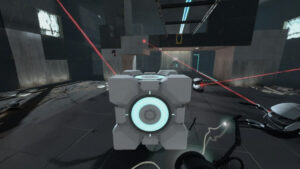
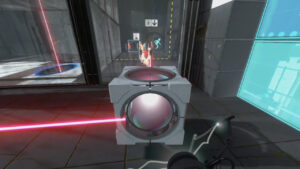
Once on the upper level you will find a series of angled platforms. Find the one to the left (if you were looking from the faith plate facing the upper level) that is angled towards the small ledge containing a switch. Leave the portal above the faith plate (orange) and move the blue portal to this angled surface. Leap through your blue portal and take the faith plate back through to launch yourself onto the ledge. Hit the button to dispense an Discouragement Redirection Cube from the nearby Vital Apparatus Vent.
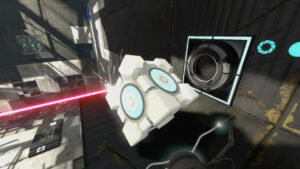
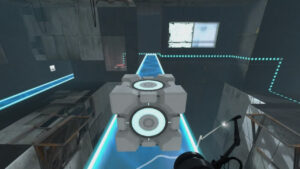
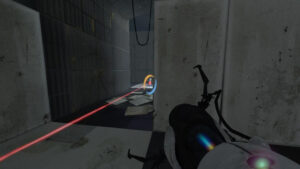
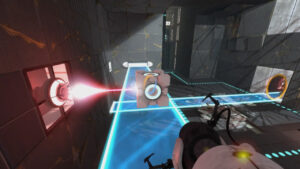
Move your blue portal again to the next nearby angled surface to use the faith plate to launch yourself onto the ledge containing the cube. Once there you can grab it and step off the ledge, using the Cube to redirect the Thermal Discouragement Beam into the white surface which stands in-front of the beam receiver, next to the final ledge containing the exit door.
Move your blue portal to the next angled surface over to launch yourself one last time, up to the ledge where the exit door sits. Once upon this ledge you can move both portals to the wall in-front of the receiver so the redirected Thermal Discouragement Beam can pass through. With it hitting the receiver, the exit door opens allowing you to leave chamber 09/22.
Video time-stamp: 0:00
Test Chamber 10/22
Note: See the achievement description below if you are trying to earn Overclocker.
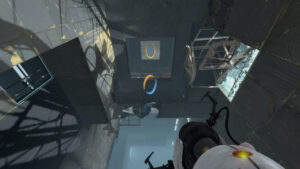
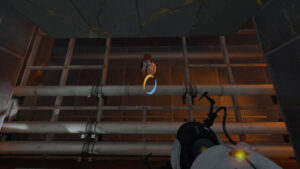
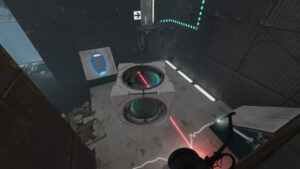
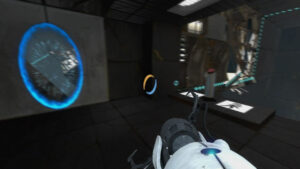
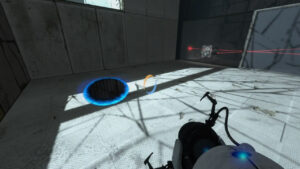
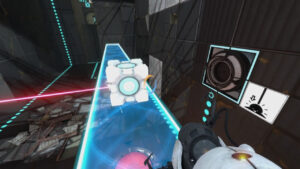
In test chamber 10/22 in chapter 3 of Portal 2, your first task will involve placing a blue portal directly above your entrance into the chamber, seen in the pictures to the right. Next find the drop to the right of the room, facing away from the entrance and fire an orange portal at the bottom of it before jumping through. This will launch you to the ledge containing a Weighted Storage Cube.
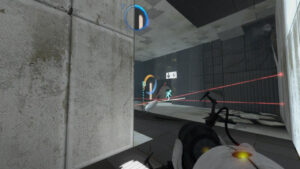
Next you will need to jump on the faith plate to launch yourself up to the first ledge. Here place the Weighted Storage Cube in the path of the laser to block it from hitting the receiver before jumping down to use the faith plate again. This drops the panel that blocked you right as you landed on the first ledge. Using the faith plate the second time around will take your further to the second ledge where you will run into a second barrier. Place your blue portal on the white space next to the switch so that we can later redirect a laser through it before hitting the nearby switch.
Move to where you hit the barrier and wait for the Discouragement Redirection Cube dropped once the switch is triggered as it will take the faith plates up to this ledge. Once in your hands, drop down to the lower ledge and swap the Weighted Cube with the Redirection Cube, placing an orange portal on the far wall with the laser directed through it, so it comes out your top blue portal into the receiver, dropping the final barrier.
With the Storage Cube back in your hands, drop down and use the faith plate one last time. The series of plates will now launch you several times, eventually taking you to the exit door’s ledge. Place the cube on the button to open the door and complete this room.
Video time-stamp: 3:02

Overclocker Achievement
This achievement is really straightforward and explained in it’s description. You don’t have to be completely on-point in order to pull this off, but it helps to save before hand, thus you can get a feel for the level in your first run, reload and try for this achievement next. The play-through of Test Chamber 10/22 in the video below is done to unlock Overclocker.
Xbox 360: 30 Gamerpoints.
PS3: Silver Trophy.
Video time-stamp: 3:02

Test Chamber 11/22

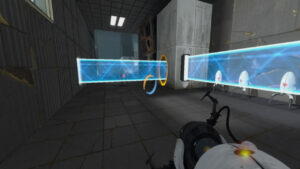
This test chamber in Chapter 3, The Return is going to revolve heavily around use of the Hard Light bridge in order to reach the various locations of interest in this room. Start off by placing your orange portal where the bridge hits the white surface and your blue portal on the opposite end of the room, by the Vital Apparatus Vent switch. Either walk across your bridge or through the portal to reach and trigger the switch.
Once you hit this switch, the vent will continuously drop Weighted Storage Cubes, one after another, that are currently fizzling one at a time as they hit the Toxic Water. Walk out over the water on your bridge and fire a portal on the white surface beneath you to extend the bridge around the walls leading to the vent. Keep finding the white spaces until you can position your bridge underneath the vent with you still on it, then walk up and grab one of the following cubes.
With a cube in-hand, you can step through the blue portal which your bridge comes out of to get back to the beginning area. From here, fire a blue portal on the wall to send the bridge over to the Super Colliding Button and step back through the orange portal to walk across the bridge so you can go drop the cube on the button.
Your final task is to either step back through the portal or walk to the center of the room so you can fire a blue portal by the switch like you did when you first entered the level, so you can cross over to the far side and leave through the now open exit door.
Video time-stamp: 5:03

Bridge Over Troubling Water Achievement
This story related achievement or trophy is unlocked through natural progression and cannot be missed. You will earn Bridge Over Troubling Water upon completing Test Chamber 11/22.
Xbox 360: 10 Gamerpoints.
PS3: Bronze Trophy.
Test Chamber 12/22
Test Chamber 12/22 in The Return begins with a quick interruption in the form of more technical issues still existing with some of the facilities mechanisms as GLaDOS continues her attempts at reconstructing everything. Listen to Wheatley as he explains where hes been and promises to help break you out soon. Shortly GLaDOS will come back with things working again, allowing you to enter the main room.
This chamber revolves around Hard Light bridges once again and utilizing portals to create said bridges to travel to various locations in the room. Start by firing an orange portal up by the bridge with a blue one on the wall near you so that you can get up to it. Once you are on the bridge, you will be able to move the orange exit portal you just stepped out of to the point where the bridge hits the white portal-able surface, now allowing you to move the bridge about with your blue portal.
Step through the bridge’s orange portal to come back out your unmoved blue portal by the Vital Apparatus Vent switch. Move your blue portal to the square white surface that has smaller tiles than the rest, directly under the vent. Hit the switch to drop a Weighted Storage Cube which should land nicely on the Hard Light bridge, allowing an easy retrieval.
If you positioned your blue portal right, it should extend past the witch ledge towards the exit door’s ledge. Walk along the bridge until you are over the toxic water between the switch and the exit door. Drop your cube on your bridge, making sure to place it within the edges of the bridge so it won’t fall into the water. Turn around to face the switch and move your blue portal to the white surface below said switch’s ledge so that the hard light bridge extends into the Super Collider Button alcove. Pick up your cube, turn back around and just walk down the bridge to reach the exit door which opens upon placing the cube on the button.
Video time-stamp: 7:12
Test Chamber 13/22
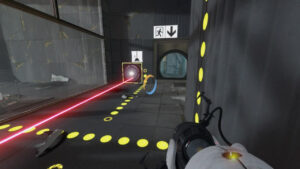
Test Chamber 05/22 in The Return of Portal 2 has you dealing with the Aperture Turrets which are small white tripod robots that guard specific areas. These stationary items will fire on you if you stand in front of them, with red tracking lasers that come out the front of them.
Start by walking up to the first turret and picking it up from behind, since it will be facing away from you. Just drop it on the ground so it falls over to neutralize it. The second turret ahead will have to be overcome by placing an exit portal behind it, quickly popping out around the corner to do so, then coming out behind it to push it over. Turret #3 around the corner can be dropped through a portal placed underneath it as a means of neutralization.
Continuing in this chamber, you will go up some stairs and reach a room with two turrets on the other side of some glass panes that go halfway up the room with two turrets behind them and some Weighted Storage Cubes near you lying about the floor. Dealing with this next pair of turrets is best done by placing exit portals above them and dropping the cubes through an entrance portal to knock the turrets over with said cubes.
After this pair, around the corner you will now find a trio of turrets to deal with. This is easier than it may look at first. Place an exit portal above the closest turret that is facing away from you while peeking around the corner with an entrance portal beneath the one turret that is on white portal-able ground. This will take out two turrets, leaving only one to deal with. The final turret can be dealt with by peeking around the corner once more and moving the exit portal above it with an entrance portal anywhere you can jump through to fall through the ceiling and knock over the last turret.
Once all the turrets are gone, you can just walk back to one of the Weighted Storage Cubes to pick it up for placement on the button which grants you an exit from this chamber. Instead of the usually tube exit for this chamber you will instead drop down through some damaged structure before the next area promptly loads.
Video time-stamp: 9:54
Test Chamber 14/22

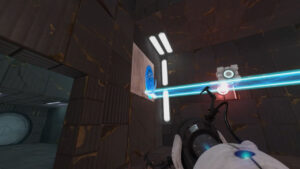
Definitely the shortest puzzle so far in The Return, Chapter 3 of Portal 2, Test Chamber 14/22 starts off with a walk through the underside of the chamber as it is being constructed out of panels. Just walk along the ledge until you reach the platform that takes you up into the chamber.
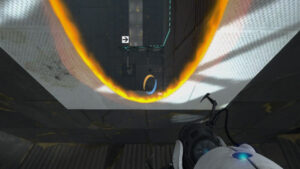
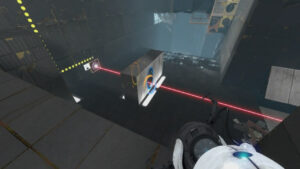
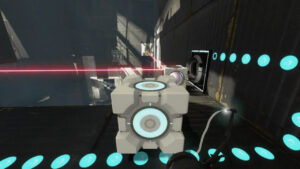
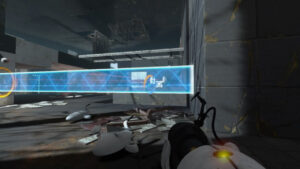
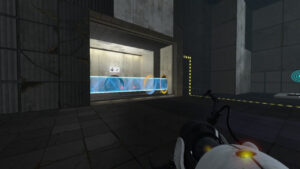
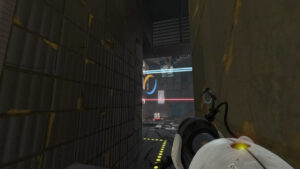
Once in the chamber itself you will find a Discouragement Redirection Cube sitting in the path of a laser beam with 3 different receivers that sit along the floor. The floor based receivers will allow lasers to pass through them and you will need to aim the cube so it is going through the two right most receivers and hitting the wall. In order to get the beam into the 3rd receiver, use portals with one where the beam, hits the wall and one to the right of the final receiver, keeping in mind the beam will come out angled sine it enters the portal at an angle. See the picture to the right.
Once all three receivers are activated, the exit door opens and you are finished here.
Video time-stamp: 12:28
Test Chamber 15/22
In Test Chamber 15/22 you will have to use Hard Light bridges to defend yourself against turrets and as a utility surface for your travels through this challenge. Upon entering you will find the bridge generator already blocking 4 turrets which are not a hazard to you, more as an example of the bridge’s turret blocking power.
Start off the level by firing a blue portal at the point where the bridge hits the wall so you can use an orange exit portal to place Hard Light bridges for the purpose of the challenges presented here. Use the bridge to block the lone turret in the hallway ahead and either advance to it and move the bridge quickly to get the drop on the turret (it takes a second or two to start firing so you can drop the bridge and avoid getting shot even if directly in-front of the turret) or go through the edge of the blue portal where the bridge enters to come out the side, behind the turret.
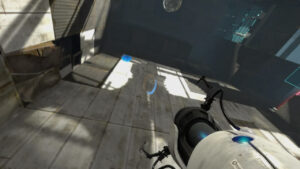
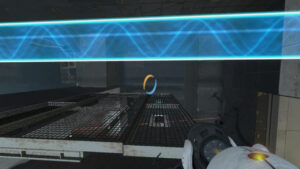
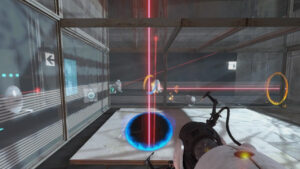
Use the bridge after neutralizing the lone turret to give yourself a safe path to the far side of the room to where the faith plates are. Once there you can fire the exit portal onto the portal-able surface above to block your arcing path over the upper walkway so that you drop down onto it instead of flying over to the opposite faith plate (see pictures). Once on this upper walkway, head towards the group of turrets protecting the Weighted Storage Cube which you will be able to safely drop onto from above.
Take the cube to knock over the turrets and neutralize them before heading over to the button in the center of the room to place the cube upon it. This will in turn drop the glass door blocking the exit guarded by a final pair of turrets. Place your Hard Light bridge exit portal in front of them once the glass drops far enough to block their line of sight until you can approach them close up and get the drop on them by quickly moving it out of the way and getting behind them. Neutralize these turrets if you feel like it and head through the door, completing Test Chamber 15/22.
Video time-stamp: 13:54
Test Chamber 16/22
Entering Test Chamber 16/22 in chapter 3 of Portal 2 starts off with having to run past a lone turret hidden behind a grating to the right of the beginning hallway leading to the central part of the chamber. You cannot destroy or neutralize it so just leave it alone as it possess little threat unless you stand in front of it.
Head to the button and stand upon it to activate the Discouragement Beam which emanates from the ceiling in this level. Next place one portal where the laser hits the floor and the second on the nearby wall so that the laser flies out of it and into the three turrets around the corner, on the other side of some glass walls. (you may have to get off the button to fire the second portal)
The beam should destroy all three turrets, allowing you to retrieve the two cubes that these turrets were guarding. First take the Weighted Storage Cube and place it on the Super Collider Button to keep the beam active. Next pick up the Redirection Cube and use it to direct the beam into the four turrets on the other side of the glass to the left, destroying all four before you angle the beam into it’s receiver. Once the receiver is activated, the nearby barrier will drop and the exit door will open, completing this Test Chamber in the chapter, The Return.
Video time-stamp: 16:43
Test Chamber 17/22
The final Test Chamber in Chapter 3 of Portal 2 is another pretty quick and easy challenge laid out before you. Start by placing a blue portal by the wall where the Hard Light hits the white surface with your orange portal on the wall nearby you to walk up and retrieve the cube.
Once you are on the bridge with the cube, move your orange portal to have the Hard Light bridge exit on the opposite side of the room above the button and alongside the beam receiver. Walk through your portal and place the cube so it blocks the beam from hitting the receiver, yet positioned so that when the bridge is removed, the Weighted Safety Cube will fall upon the button below.
With the cube still blocking the laser, drop off the bridge and head towards the platform at the far end of the room that raised up earlier when the beam was no longer blocked. Once you are standing upon it, you will want to move one of your portals to remove the Hard Light bridge from underneath the cube. The cube will stop blocking the laser, which will now hit the receiver and raise the platform you are standing on while falling upon the button and opening the exit door that sits at the top of the platform’s trip.
Video time-stamp: 18:22
Chapter 3 “The Return” Walkthrough Video
Last Updated on October 5, 2020 by Standard of Entertainment