
Joan of Arc – French Campaign
Mission 4: The Rising
Overview
In The Rising, you’re given a small force to start out with, needing to traverse part of the southern half of the map to reach a town in its early makings. From there, you’ll need to build up a defense to hold your side of the map while gunning for the three enemy AI’s Town Centers, the destruction of which will force them to leave the area. For the most part, this is a straightforward econ, tech, and attack type mission with the one twist that you simply have to remove the three town centers as opposed to devastating the enemy forces to make them resign.
Layout
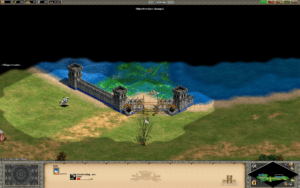
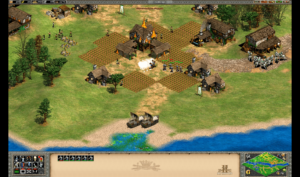
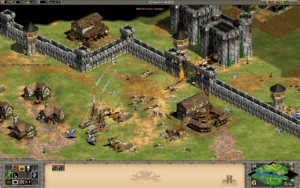
The layout in this mission is pretty simple. The map is divided into almost equal halves by a river that runs from the left to right corner. On the top half of the map, await the three enemy AI towns, one to the left, right and center with established bases from the get go. You begin on the lower half of the map, impeded by a small group of enemies with a few Green watch towers littered about, but otherwise unoccupied of substantial enemy forces. The two halves are connected by a pair of water crossings, one on the left and right sides.
Objective: Travel west to reinforce the French town. Joan must survive.
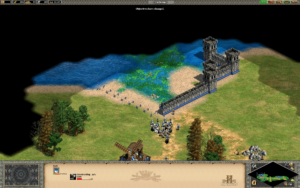
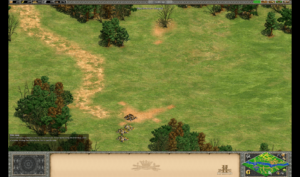
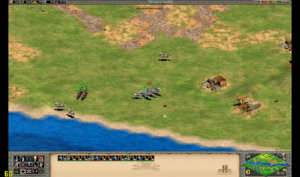
Take your initial group of forces and start moving them directly west as soon as possible. Try to uncover a good visual of the water path and where it meets the land on your side so you can come back later with a villager to wall it off. Stay along the road and you’ll soon encounter the one and only group of enemies on your way, which also happens to be the entirety of the red British Guard forces. Clear them out and continue on your way, making sure to stay on the road. Going too far north or south will have you running into some enemy watch towers placed above and below the roads, guarding some small deposits of gold and stone. These can be dealt with easily later on.
Establishing your base and its defenses.
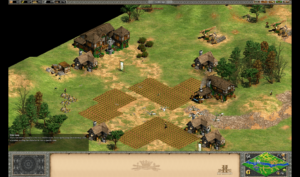
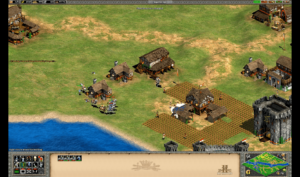
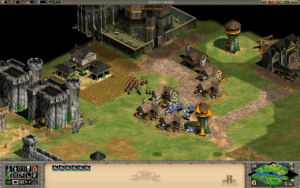
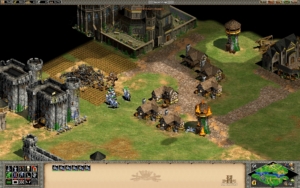
Once you reach the allied town and it transfers to your control, get your villagers harvesting food from the bushes right away so you can quickly build more villagers to ramp up your econ. The next most important resource, at least initially, is stone, then wood, then gold, so build up harvesters in that order for the most part.
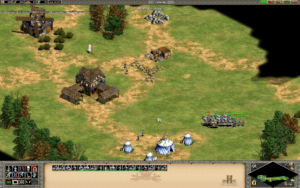
Scout out the land above your town and you’ll find the left water crossing, which you should use a villager to wall off immediately, essentially keeping the enemy from entering the bottom half of the map, making it your half of the map. Take a couple additional villagers and move them to the right with a defending unit or two to build a wall on your side of the right crossing.
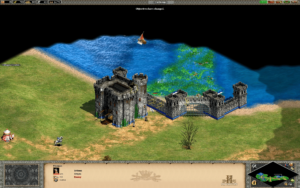
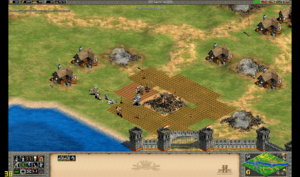
Walling off your half of the map is important for a few reasons. First, of course, to stop attacks before they get to your base. Second, the water crossings make great choke-points for more effective defense when you start placing castles. Finally, Orange has a nasty habit of building expansions right outside your base if not walled off, which can lead to a painful mission experience as your slowly overwhelmed by a constant stream of units being produced right outside your town.
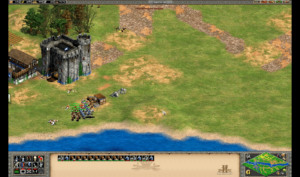
Once you wall off, save up your stone for a couple castles, at least one placed behind the walls you placed to block the passages. Thankfully you start in the castle age here so you don’t need to age up for this. This should deal with the vast majority of attacks against your walls, preventing any chance of breaking through by the enemy. The left passage may need a pair of castles for full coverage since the area where it meets your half of the map is a bit wider than the right.
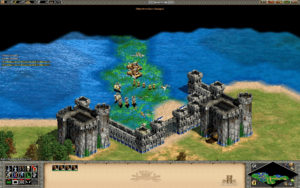
Important: Although you’ll now be walled off from land based assaults you’ll still receive some attacks from Green who uses transport ships to land small groups of forces on your side of the map. They are the only one of the three main AI forces to do this and their landed attacks still come at you with weaker numbers than if they were coming by land. Keep whatever forces you have left near your town and try to pull their attacks into range of your castles to preserve your forces until you can deal with Green as a whole.
Objective: Destroy the town centers of Rheims, Troyes, and Chalon.
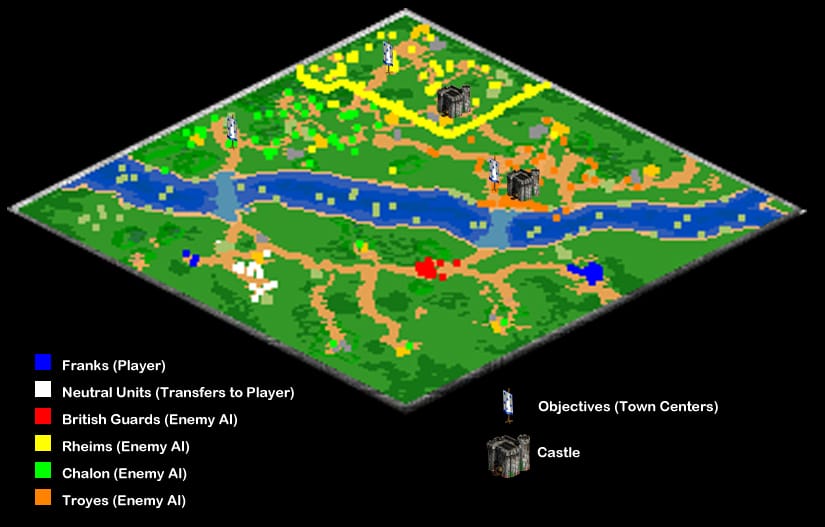
Chalon (the green AI) is really easy to take out after you’ve walled and castled yourself in (at least one castle on each side). Get a barracks up and produce a couple man-at-arms, taking some of your remaining soldiers from the beginning of the mission if you still have any of them. With about six of these units total, create about 7-8 petards from your nearby castle. Make sure to send a scout to their base, just north of your own, if you haven’t uncovered their town center yet.
Eliminating Chalon
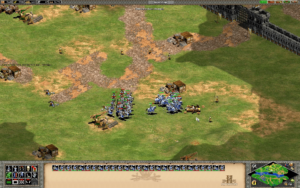
Group your man-at-arms and petards into separate control groups with the melee units up front making a meat shield for the petards as they run straight for the enemy town center. Only 5-6 of them need to make contact, less if you have the siege weapon upgrade at your university, but having a couple extra makes sure you fell the building in one try. Avoid attacking anything with your man-at-arms except for enemy military units that would otherwise be going for the petards, as striking villagers or nearby buildings can cause a garrison, which may shoot up your soldiers or bring in reinforcements from nearby before you start blowing up the town center.
Once green loses their town center, all their military buildings self-destruct, including the watch towers on your side of the map, followed by their soldiers and finally their villagers before the AI resigns.
Note: This strategy is explained differently here, than performed in the video below as it turns out to be a more optimal one than waiting to take out Chalon until later.
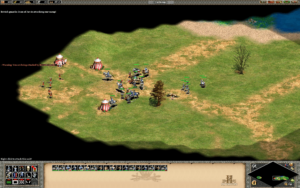
Eliminating Troyes

With the pesky water landings of Chalon now ended, you can take your time with the rest of the mission, which you’ll want to do to an extent to tech up for the next assaults. Yellow will eventually start to send the occasional trebuchet against your castles, which makes them the final great threat here. Establish a forward base using a castle, where Chalon once stood, away from the walls of Yellow’s base to avoid being bombarded by trebuchets firing within the walls of the city.
Aggravating yellow too much may attract additional trebuchets or long-bowmen, making your coming battle with Troyes more difficult, so play it cool when you’re about ready to attack Orange. Heavy cavalry archers are one of the best options you have against long-bowmen, and Knights against trebuchets, as the speed of both allow them to compensate for their later’s extreme ranges.
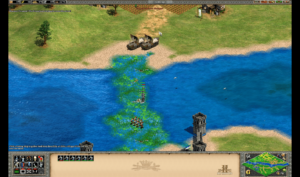
You have two routes of attack, the first being an attack similar to your first against Chalon, a squad of 8-9 petards with meat shield escort to come in over land from your expansion base, or just sent through the left passage and cutting right along the northern edge of the river. This first route allows you to avoid coming into range of the castle which protects the right side of the town center, by the wall that blocks off their side of the right passage. Both your meat shield and petard group should be a bit larger than before since this attack will be more hazardous.
The second route is via the right river crossing, breaking through the wall that guards Troyes to avoid having to potentially pass through yellow’s army, if they happen to be out in the area surrounding their base in force. You can do this with an even larger petard group and shield, as your bound to lose more from the castle, not to mention needing a nice handful to break a hole in the wall itself. Optionally, you can choose to go with a group of soldiers backed up by a few trebuchets, which can bombard the wall, castle and town center from long range without having to suffer return fire from the castle. Trebuchets are best sent through the river crossing route, as taking the land route from where Chalon used to exist exposes the siege weapons to flanking maneuvers as they draw the enemy’s attention.
Eliminating Rheims

The final challenge that stands in your way to victory here is Rheims (yellow) and their heavily fortified town. It is surrounded by walls, defended by a pair of castles and littered with watch towers. This already is quite the challenge, but to make it worse is their constantly replenishing army of onagers, trebuchet and long-bowmen.
Your options are to establish a strong army of ranged and melee cavalry backed up with trebuchets for an extended siege battle, or several groups of petards with meat shields yet again. Either option you go for will probably be most effective if you can circle the castles. Approaching from the direction of Chalon, as close to the map edge as possible, can lead you right to the town center behind some walls, but not before encountering an array of watch towers. The Troyes side has you dealing with the castles more than the watch towers.
Either way, it’s a good idea to save (just in case) and just keep building reinforcements to keep the pressure on yellow, as they will eventually give way with persistence. If you see an opportunity to cause some significant damage to their town center, go for it, as it won’t be repaired or rebuilt and like with the other two AI forces, leads to their complete destruction in this mission.
Note: The position of the castles may shift from game to game, especially if you destroy one as the AI will try to rebuild it immediately. This can end up making the assault more difficult if they rebuild their castles near the town center. Getting scouts through a broken wall section to scope out the situation can help immensely in how you plan your exact route of attack.
Mission 4: The Rising
Video Walkthrough
Last Updated on October 7, 2020 by Standard of Entertainment