
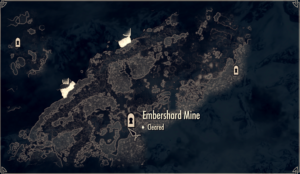
Embershard Mine
Primary Location Guide

This walkthrough guide covers the Embershard Mine primary location in The Elder Scrolls V: Skyrim. Read on for all pertinent information about this location such as important items, characters, how to find it, and other important details. This guide also has a custom map diagram showing the location of all the Iron Ore Veins inside the mine along with other locations of note.
Table of Contents
- General Info
- Significant Items
- How to Find The Embershard Mine
- Mine Entrance
- Interior Location Map
- Embershard Mine Interior Walkthrough
- Video Guide
General Info
Embershard Mine is one of the first bandit encampments and Iron Ore Vein locations players can find upon beginning a new game within The Elder Scrolls V: Skyrim. Occupied by a small weak force of enemies, this area is perfect for low level characters who wish to begin accruing minerals for smithing armor and weaponry, or just beating up a bunch of bandits while taking their loot.
Significant Items
- Spell Tome: Clairvoyance (Jump to item ->)
- Smithing Skill Book: “Light Armor Forging” (Jump to item ->)
- Iron Ore Veins x8
- Chests x2
- Grand Chest x1 (Jump to item ->)
- Fly Amanita (Lots)
- Beehive & Bees (outside)
How to Find the Embershard Mine
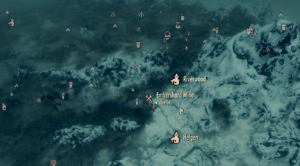
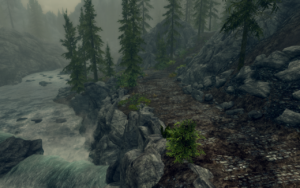
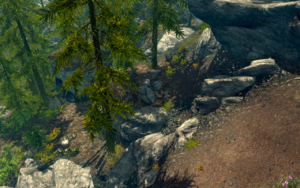
On the path out of Helgen, this primary location is just east of the Guardian Stones and along the path traveled towards Riverwood. Following the road to Riverwood from the stones, look for a waterfall on your left, just after which you will find a path leading up the hill to the right which you can follow directly to the entrance of the mine.\
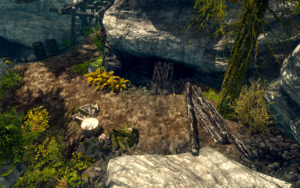
Mine Entrance
Upon approaching the main entrance of the Embershard Mine in Skyrim, there will be a single Bandit guarding the entrance which will rush to attack you as soon as he detects your presence, which is likely to be early on, since you probably won’t have a significant sneak skill at this point. Take him out and check out the nearby Wood Chopping Block. If you are looking to gather some firewood, you can do so now with the woodcutter’s axe by the tree trunks lying on the ground nearby.
You will also find a Bee hovering nearby and can take a path past the chopping block to get on a ledge over the mine entrance where you will also find a Beehive and potentially additional Bees.
Embershard Mine Interior Walkthrough & Map
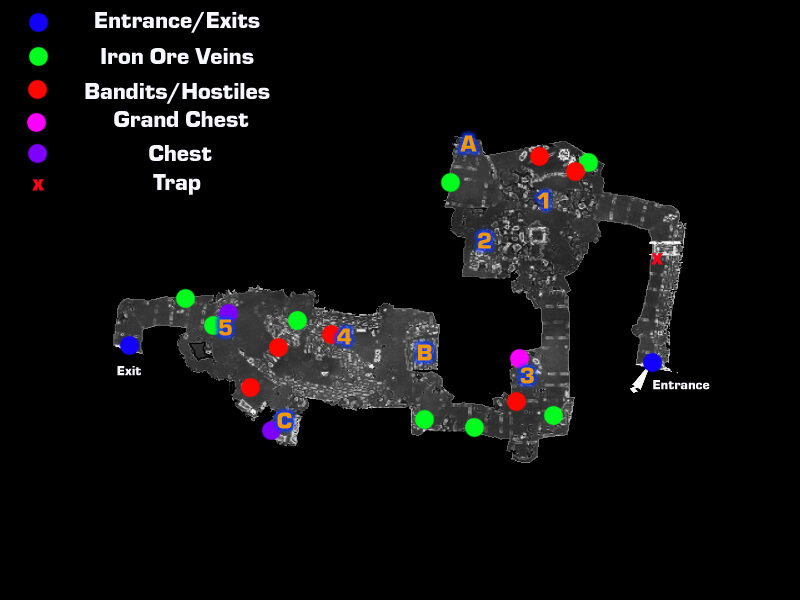
TRAP!
You will enter the mine at the blue entrance location marker in the map above where you also find the white arrow that denotes character location. As you head down the initial path, look out for the tripwire along the ground which denotes the only trap in the Embershard Mine (denoted by a red X in the map above).
While sneaking you can disarm the trap by triggering the wire, which causes the Rockfall trap to release its hazards with you standing away from the impact zone. Alternatively, you can avoid it altogether. Just make sure you don’t trigger the trap while underneath the rocks.
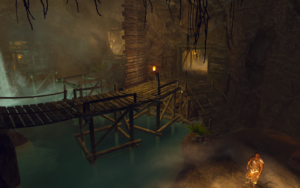
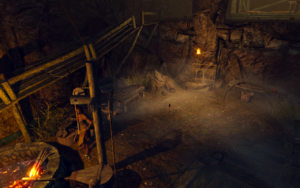
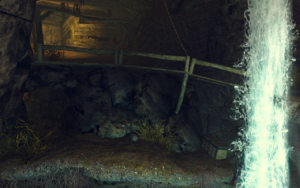
[1] Drawbridge Room
In this room, you will encounter the first two Bandits within Embershard Mine, which are standing by an Iron Ore Vein, one of which is engaged in mining from it (the NPCs can’t deplete or drain the ore so no worries). There is a drawbridge that is currently raised preventing you from accessing deeper parts of the cave.
Take out these two Bandits and find a pickaxe by the Iron Ore Vein so that you can begin your mining adventures if you don’t already have one. Next, you can head across the walkway into the next cavern area where you will find points 2 and A in order to find the drawbridge controls.
[A] Collapsed Chamber
Heading into the next accessible cavern west of point 1, you will find the second Iron Ore Vein in Embershard Mine and to the right of that, a deceased miner who perished in the collapse of the ceiling here. Check near the skeleton to find a journal written by the deceased mentioning their paranoia of the exact consequences that lead to their demise.
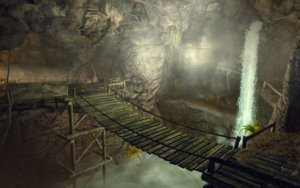
[2] Drawbridge Control Room
Head south from point A to find a room overlooking the drawbridge and waterfall you saw at point 1. There is a lever here that you can use to lower the bridge and allow you to delve deeper into Embershard Mine.
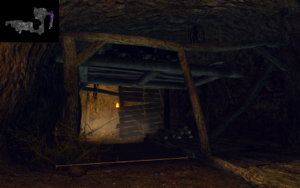
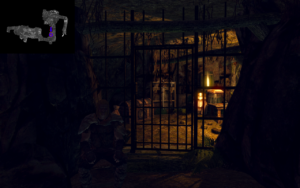
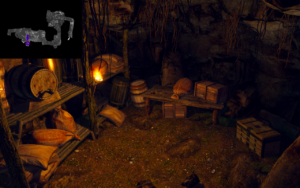
[3] Locked Jail Cell
Once you’ve lowered the drawbridge you can now travel south deeper into the mine. Cross the bridge and head down the next hallway to encounter a Bandit guarding a pair of Novice locked jail cells. One of them is relatively empty, but the other as seen in the picture to the right contains the Grand Chest for this dungeon along with a Weapon Rack, some various other supplies, and most importantly, the Spell Tome: Clairvoyance.
Continue towards the next main chamber at point 4 while looking to the left side of the hall to find three more Iron Ore Veins.

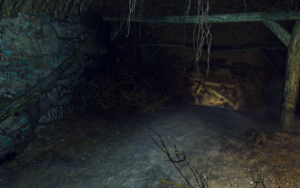
[B] Bandit’s Sleeping Area
Here you will find an area overlooking the next and final main chamber along with some sleeping mats the Bandits use, however little of interest otherwise.
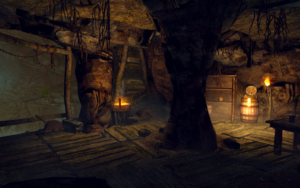
[4] Smithing Chamber
In this massive room, you will find a series of the bridge allowing you access to the exit and a cove to the south of the map above the water in the central area of this room. First, take out the three bandits in this area (the one on the bridge has a bow and patrols about a bit). Then head down towards the forge and workbench. Check the table to the left, next to the Weapons Rack down here to find some loose Iron Ore and the Smithing Skill Book: Light Armor Forging.
Before heading up the wooden walkways to point C which is the next stop on your trip, check the north side of the mini-lake here against the water’s edge to find another ore vein.
[C] Storage Room
Take the wooden walkways to get up to this cover where you will find a table and some various food items where one of the Bandits was previously sitting. Look to the room on your left to find this smaller chamber where a Chest and some loose gems and gold can be looted.
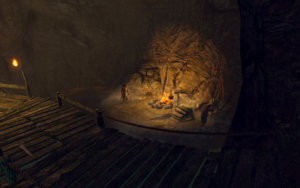
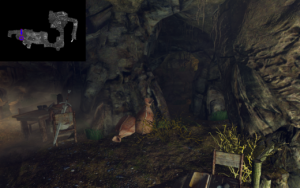
[5] Precarious Ledge
In the second picture to the right (click thumbnails), you will find a doorway that is somewhat hidden to the right of the table mentioned in point C and you can locate the hallway which takes you to the overhang which is otherwise inaccessible at point 5. Alternatively, you can also drop down to this ledge by jumping off the wooden walkway above. Find the second regular chest here along with an ore vein.
Exit
Once you have cleared and looted everything of significant value in the Embershard Mine, take the wooden walkways towards the western, upper hallway to proceed towards the exit doorway. You will re-enter Skyrim from a location just north-east of where you came in. Don’t forget the final ore patch on the right side of the hallway.
Embershard Mine
Video Guide
Last Updated on October 4, 2020 by Standard of Entertainment